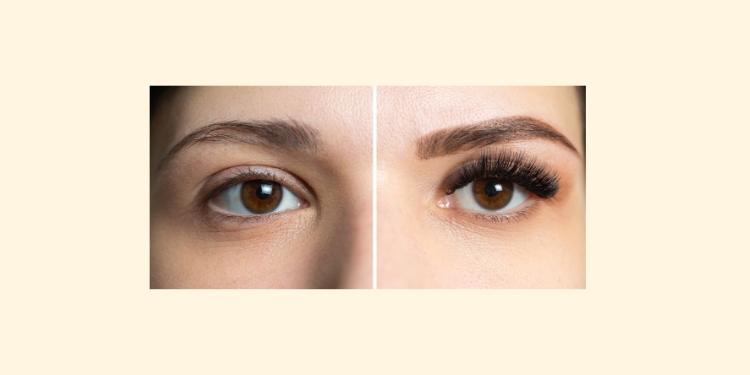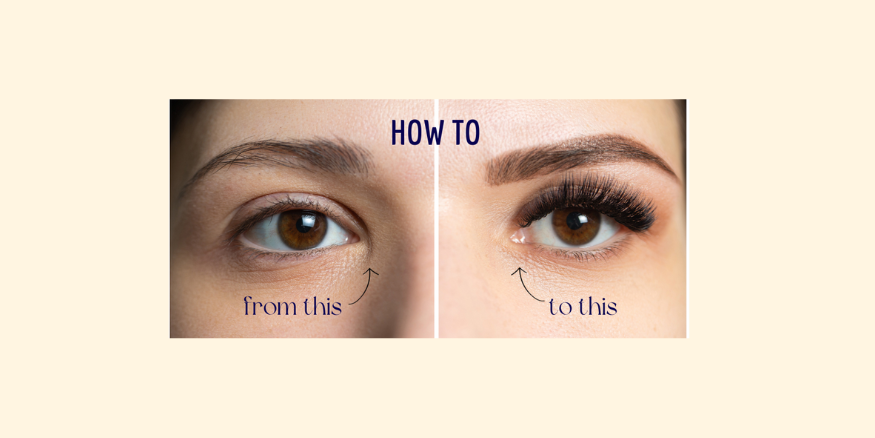
DIY eyelash extensions can be a great way to save money and get the look you want without having to go to a salon. But let's be honest, they can also be a bit of a challenge, for some. I mean we all know someone, who knows someone who gets very frustrated and annoyed when something is not going as they planned, and starts screaming and throwing things at the wall or out the window (asking for a friend....) This could be the way with DIY lash extensions too, as how easy or hard it is to apply them depends on many factors, such as the eyeshape, the eyelid or the eyelash shape of the person applying them. Therefore, I have put together some tips and tricks to help you get the best results, without breaking anything around you :-P
-
Choose the right lash style. If you're not sure which style to choose, ask your cat. They'll have some great suggestions. Just don't be surprised if they try to steal your lashes while you're applying them. Ok, now seriously. This article will explain in more depth how to choose the right style for you.
-
Gather your supplies. Things you will definitely need are:
- DIY Eyelash extensions kit (this will include DIY eyelash extension segments, bond,sealant, remover and applicators)
- Mirror
- Eyelash curler
- cotton swabs
- patience (optional)
In addition to the basic supplies listed above, you may also want to have a glass of wine on hand. It's not essential, but it can help to steady your hands and reduce your stress levels.
-
Prepare your lashes. Clean and dry your lashes thoroughly. Do not use an oil based makeup remover solution.
- Curl your lashes. Using an eyelash curler to curl your lashes, will make the application process much easier as your lashes will take up a similar form to those of DIY eyelash extension segments.
-
Apply the glue. Use clear bond, if possible, as this will not ruin your previously applied makeup even if you get some on your skin. If you do, use a cotton swab to wipe it away. Don't worry, it won't hurt. Just don't get it in your eye. Then you'll really be crying.
-
Apply the DIY eyelash extension segment. Use tweezers to carefully apply the DIY eyelash extension to your natural lashes. I recommend you to start at the outer corner of your eye and work your way in. If you accidentally glue two extensions together, don't panic. The bond we recommend does not dry in 2 seconds, you have plenty of time to reapply that naughty segment that does not want to stick in the right place. Just use a tweezer to gently take the DIY lash segment off and put it back again. And try not to laugh. It's not funny. Really.
-
Allow the glue to dry. Once you have applied all of the eyelash extensions, allow the glue to dry completely. This may take a few minutes. In the meantime, you can try to wiggle your nose. It's a great way to pass the time and look ridiculous at the same time.
- Apply sealant. Once the glue has dried on both eyes, use sealant on lashes, and clip them together using the tweezers.
-
Brush your lashes. Once the sealant is dry, use a cleansing brush to brush your lashes into place. And that's it! You now have beautiful, long, fluttery eyelashes.
Here are some additional tips and tricks for keeping your DIY eyelash extensions looking their best:
-
Avoid rubbing or pulling on your lashes. This can damage the extensions and cause them to fall off prematurely. If you have to rub your eyes, do it so gently that you could cry over a dead goldfish.
-
Use a gentle cleanser to wash your face around your eyes. Avoid using oil-based cleansers, as these can weaken the adhesive bond. And don't forget to remove your makeup before bed. You don't want to wake up with raccoon eyes, unless of course, you're trying to achieve a certain look.
-
Avoid using mascara on your eyelash extensions. Mascara can damage the extensions and shorten their lifespan. But if you must use mascara, use a water-based mascara and apply it sparingly.
-
If you need to remove your eyelash extensions, use a special eyelash extension remover. And be careful not to get any in your eyes. Otherwise, you'll really be crying.
With proper care, your DIY eyelash extensions can last for several days. So go ahead and give them a try. And don't forget to laugh at yourself along the way.