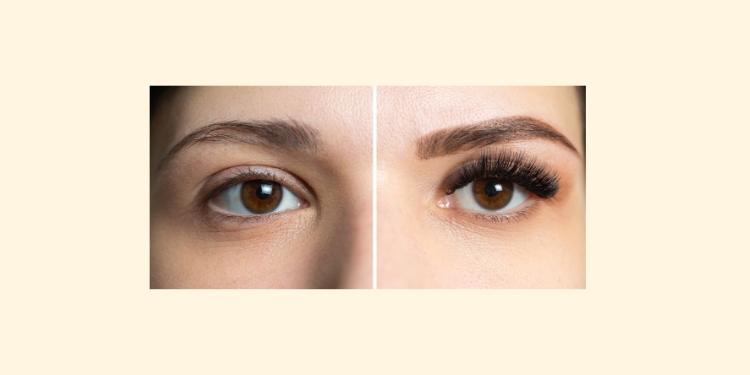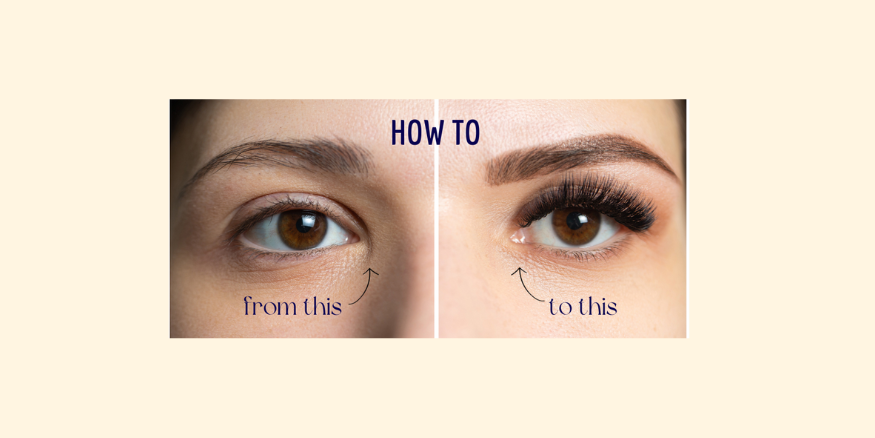
Eyelash extensions can be a great way to enhance your natural lashes and give your eyes a more dramatic look. However, going to a salon for eyelash extensions can be expensive and time-consuming. If you're looking for a more affordable and convenient option, you can do eyelash extensions at home, also called DIY eyelash extensions.
Here's a step-by-step guide on how to do DIY eyelash extensions at home:
-
Gather your supplies. You'll need a DIY eyelash extension kit, which includes DIY eyelash extensions, glue, remover for DIY eyelash extensions, and applicators (tweezers). You'll also need an eye primer (optional), a mirror, some cotton swabs and a cleansing brush.

2. Prepare your lashes. Clean and dry your lashes thoroughly. This will help the glue adhere better. You can use a makeup remover pad infused with your favourite makeup remover solution to clean your lashes, but make sure it's an oil free one. And then you can use another makeup remover pad, a dry one this time, to dry off your lashes.
-
Apply the glue. Apply a thin, even layer of glue to the base of your natural eyelashes, but be carefull not to apply any in your eye or skin. In case you some in your eye, wash out immediately with water. If you get any glue on your skin, wipe it off using a cotton swab. I recommend you to use a transparent glue, this will save you a lot of time, in case your makeup is already done and you don't want to wipe itt all off because you have smudged a black glue on your eyes.
-
Apply the DIY eyelash extension. Use tweezers to carefully apply the DIY eyelash extensions one by one under your natural lashes. I recommend you to start at the outer corner of your eye and work your way in.
-
Allow the glue to dry. Once you have applied all of the DIY eyelash extensions, allow the glue to dry completely. This may take a few minutes.
- Apply sealant. Once the glue has dried, apply a thin layer of sealant under the lash extensions and just to make sure they are very well sealed, apply a thin layer on the top but only at the base of the lashes and be careful not to put any on your skin. Use this sealant, which is also a bond, as this has a specially designed head which makes an easy applycation.
-
Brush your lashes. Once the sealant is also dry, use a cleansing brush to brush your lashes into place.
And now your done. Was it hard?
With proper care, your DIY eyelash extensions can last for up to 10 days.
For instructions on maitenance of your DIY lash extensions, check out this article.
For best results we recommend buying the Dare To Glam DIY eyelash extensions kit.